
Everybody loves cake!
If it's either the centrepiece in a birthday celebration to the cheeky
cupcake you have on the road, it's a sweet food where there's something
out there for anyone with a sweet-tooth.
The topic of this post puts several people in envy whenever I discuss it. When ever a discussion of cake comes into question I am always quick to say that I have a wonderful cousin Tina who is absolutely fabulous at designing and making cakes that are at the height of perfection. I know everyone is each to their own and think that the people they know are the best at what they do, but I seriously think my cousin is absolutely amazing when it comes to making cakes that look and taste absolutely delicious. Her cakes are designed to suit any occasion for any person, from the perfect princess birthday cake for your little girl, a made-to-measure wedding cake or the most fun and exciting Christmas and Easter themed cupcakes.


Now when it comes to cake there's a selection of books and recipes available online, but there's one trusty source that provides an excellent overview over cakes overtime, described in the blurb of Cakes: A Global History by Nicola Humble that "explores the origin of modern cake and its development from sweet bread to architectural flight of fancy, together with the meanings, legends and rituals attached to cake throughout the world". Humble hits the nail on the head when describing the significance of cake in our lives - "They are simultaneously utterly necessary and absolutely crucial. You can't properly have a birthday or a wedding without a cake". (8) This goes hand in hand with what my cousin Tina says and does. Her business has flourished as she presents unique designs fit for any occasion and personalizes them to suit each consumer to make it that extra bit special. Humble presents a range of cake recipes from the traditional Victoria Sponge, to ancient cakes of Paneforte. I will definitely try some of these out but for now, it was when I went to a restaurant for sister's birthday and got a chocolate brownie dessert which was presented gorgeously and I wanted to remake it for the sake of this blog. I opted however, for something slightly different with a modern twist - where cake meets biscuit in an Oreo Brownie Cake. The recipe was as follows:
Oreo Brownie Recipe
Ingredients
- 165g/5½oz butter, plus extra for greasing
- 200g/7oz dark chocolate, grated or finely chopped
- 3 free-range eggs
- 2 free-range egg yolks
- 1 vanilla pod, seeds only (or alternatively 2 tsp vanilla extract)
- 165g/5½ oz soft light brown sugar
- 2 tbsp plain flour
- 1 tbsp cocoa powder
- pinch salt
- 154g/5½oz pack chocolate biscuits, such as Oreos, broken into quarters
- icing sugar, for dusting
Preparation method
- Preheat the oven to 180C/350F/Gas 4. Grease a 20cm/8in square baking tin with butter, then line with baking paper with the paper overlapping the sides a little.
-
Melt the butter in a pan over a medium heat. When
the butter has melted, remove the pan from the heat and add the grated
(or chopped) chocolate. Leave to stand for a few minutes, or until the
chocolate melts, and then stir together. Alternatively, you can put the
chocolate and butter in a bowl and melt in the microwave in 25-second
blasts, stirring well each time.

-
Whisk the eggs, egg yolks and vanilla together in a
large bowl until the eggs begin to get light and fluffy. Add the sugar
in two additions, whisking between each. Pour it around the side of the
egg mix so as not to knock out the air that has been whisked in. Keep
whisking until the mixture becomes stiffer. Once the egg mixture is
ready, pour the chocolate into it - again around the sides so as not to
knock the air out.

-
Add the flour, cocoa powder, salt and a third of
the biscuits and stir until fully combined, then pour the mixture into
the prepared tin. Scatter the remaining biscuits over the top, pressing
them in slightly. Bake on the middle shelf of the oven for 25–30
minutes. The middle should be very so slightly gooey. Leave the brownies
to cool in the tin - the top will sink and crack a little.

- Pull the brownies out using the overlapping paper and cut into squares. Dust with icing sugar.

Looking at this finished product I'd have to say it was quite successful - brownie points for me! (haha geddit!) So here's when disaster happened! I cut them all up ready to decorate and popped them in a box to do the next day for the sake of this blog but cheekily my dad took them to work for his colleagues (which I promised he could do after I decorated them!) So I didn't have the opportunity to decorate these as I pleased but the look I was going for was something along these lines:
Ice cream on the side of the brownie
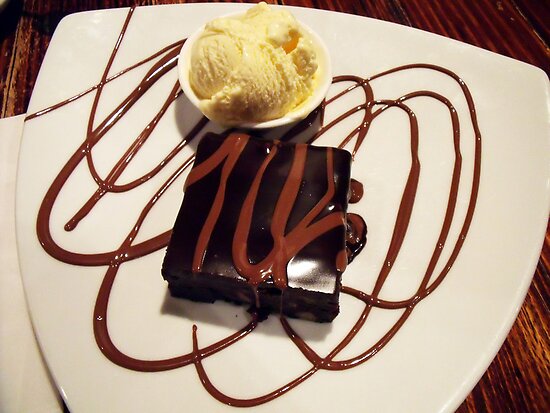
Ice cream on top of the brownie

I aim to have a take two session of this brownie creation so when I do I'll definitely repost some nicely decorated presentations (even though I won't be eating them due to that ongoing diet I'm having since about 10 years ago!)
No comments:
Post a Comment